
centos安装nginx,配置将http重定向到https及相关其他配置
 编写于2025年06月07日 修订于2025年06月30日
centos安装nginx
安装依赖
root用户任意目录执行
# 安装 nginx 需要先将官网下载的源码进行编译,编译依赖 gcc 环境
yum install gcc-c++
# pcre是一个perl库,包括perl兼容的正则表达式库,nginx的http模块使用pcre来解析正则表达式,所以需要安装pcre库
yum install -y pcre pcre-devel
# zlib库提供了很多种压缩和解压缩方式nginx使用zlib对http包的内容进行gzip,所以需要安装
yum install -y zlib zlib-devel
# nginx 不仅支持 http 协议,还支持 https(即在ssl协议上传输http),所以需要在 Centos 安装 OpenSSL 库
yum install -y openssl openssl-devel
下载安装nginx
# 任意目录可执行,如:/data目录
cd /data
# 下载nginx
wget https://nginx.org/download/nginx-1.22.1.tar.gz
# 解压
tar -zxvf nginx-1.22.1.tar.gz
# 进入解压后的目录
cd nginx-1.22.1/
# 配置(带有https模块)
./configure --prefix=/usr/local/nginx --with-http_stub_status_module --with-http_ssl_module
# 编译
make
# 安装
make install
# 进入安装后的启动目录
cd /usr/local/nginx/sbin
# 启动nginx
./nginx
验证
netstat -ntlp

浏览器访问http://ip

后续
# 关闭nginx服务
./nginx -s stop

# 配置nginx环境变量
vim /etc/profile
export PATH=$PATH:/usr/local/nginx/sbin
# 让文件生效
source /etc/profile
nginx配置将http重定向到https
# 进入nginx配置文件所在目录
cd /usr/local/nginx/conf
# 打开nginx配置文件
vim nginx.conf
# 找到“server { listen 80;”
# 修改配置
server_name  你的域名;
return 301 https://$server_name$request_uri;

# 保存退出,重载配置,重启也可以
cd /usr/local/nginx/sbin
./nginx -s reload
https我已经在springboot中配置,所以在nginx里边不需要配置https的相关内容。
可在浏览器中验证http重定向到https的配置效果。
在springboot的application.yml中配置https压缩访问html的方法
因为https流量直接通过Springboot服务,并不经过nginx,所有要想配置相关内容,需要直接配置到Springboot项目中。
server:
  compression:
    enabled: true  # 启用压缩
    mime-types:    # 压缩的文件类型
      - text/html
      - text/css
      - application/javascript
      - application/json
    min-response-size: 1024  # 最小压缩阈值(字节)
    excluded-user-agents: false  # 不排除任何用户代理
验证
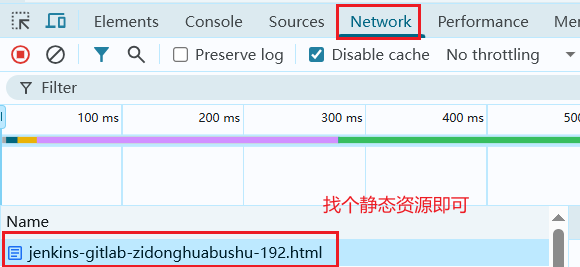
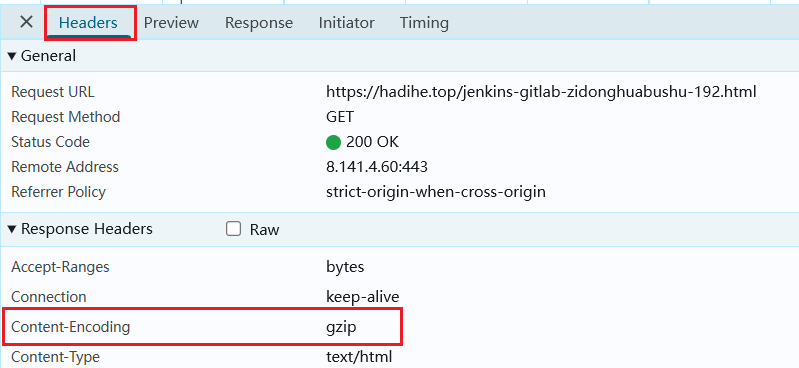
浏览器访问相关页面,右键点击 → 检查 → 点击Network,在Name列表中选择一个静态资源,如这里是.html静态文件,然后在后边的Headers的Response Headers里边如果有Content-Encoding的相关内容,就表示压缩生效了。
参考
https://blog.csdn.net/weixin_47110096/article/details/135741324